
|
Many people have been asking, “What's wrong with my Monarch caterpillar/egg/chrysalis?” This is a list of the MOST common problems that the Monarch Rearer may encounter and how you can either avoid your Monarch from being infected or avoid the infection from spreading to your other caterpillars. Hopefully these tips and indicators can help you raise healthier Monarchs in the future! Warning: Some photos may seem graphic or unpleasant. UPDATE: Flea and tick treatment along with several cleaning products in your home can be deadly to Monarchs caterpillars.We recently received this tip from one of our readers. Any flea or tick prevention given to cats or dogs, both topically applied and orally administered, are toxic to Monarch larvae. Allowing your treated cat or dog to rub against your Monarch's cage can cause harm or death to the caterpillars inside. Petting your animal after treatment and then gathering milkweed leaves or touching anything in your Monarch's cage can harm your caterpillars. Also, be aware of any potentially toxic cleaning products you may be using around your caterpillar cage such as Febreeze, other air fresheners, carpet cleaners, Windex, or Lysol. Remember that these are very delicate creatures and even small doses of chemicals can be fatal. Prevention: Whenever interacting with your Monarch caterpillars make sure you washed your hands prior and/or wear gloves to be sure that your hands are free of any chemicals. Try to use natural cleaning products inside the room your caterpillars are living. Black Death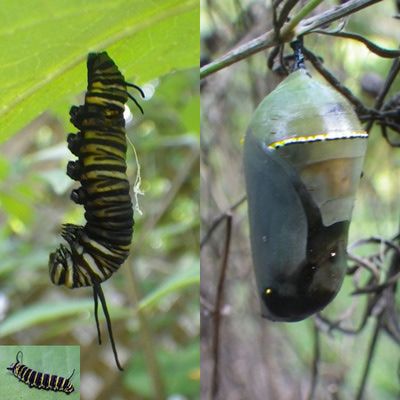 What is Black Death? As the name suggests, this is a fatal and very unpleasant ailment for the Monarch. Black Death is a general yet appropriate term used to describe the effects of two different infections. Pseudomonas is a bacteria that thrives in moist environments and Nuclear polyhedrosis virus (NPV) is a virus. How to tell if your Monarch has Black Death: Your caterpillar may be fine one day and the next start to become lethargic, start to deflate, refuse to eat and start to turn a darker color. Sometimes their chrysalises will turn dark brown or they pupate and then liquefy into a black goo. This can be a traumatic experience for the Monarch Rearer but once your caterpillar has contracted Black Death, it is nearly impossible to save them and the best thing to do is remove it immediately from the cage and disinfect anything it may have touched in order to prevent it from spreading to other caterpilalrs. Note: NPV causes the caterpillar to climb to a high spot, hang in an l or inverted V shape, and die. The caterpillar then liquefies inside and when the skin of the caterpillars splits open, the black goo will send millions of virus particles on its surroundings. The smell is very pungent. If a caterpillar lies at the bottom of a rearing container (instead of crawling higher in the container) and dies either firm or mushy, it is not infected with NPV. How to prevent Black Death
O.E. (Ophryocystis elektroscirrha)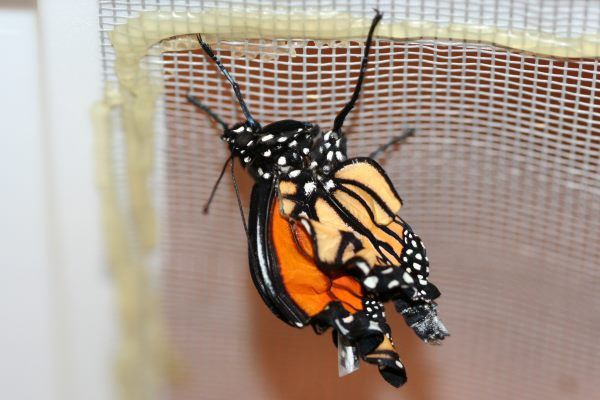 What is OE? OE is a protozoan parasite that is spread through microscopic spores coming off the wings and bodies of adult butterflies. These spores are packed in between scales on the Monarch's body and when it lays eggs, often attaches to the egg shell. Because OE is a parasite, it relies on a living host and will generally not kill Monarchs but will lead to weakness, disfigurement, and lethargy. Eventually it may die from sheer exhaustion. How to tell if your Monarch has OE: You won't be able to tell if a Monarch has OE until it's in the pupal or adult stage. Infected chrysalises won’t have a uniform green color. You can check your chrysalis closely to make sure it's dark spots are mirrored on both sides. Heavily infected Monarchs may not emerge or if they do they may be deformed or too weak to hold on. How to prevent OE:
Tachinid FliesWhat are Tachinid Flies? Tachinid flies can be difficult to differentiate from other flies in your garden. However, if you look closely, you will see that they are hairy and have huge red eyes. 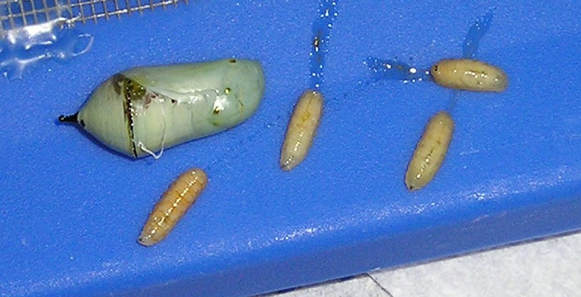 How tell if your Monarch was infected by a Tachinid Fly: This is one of the easiest Monarch infections to identify. They lay eggs on monarch caterpillars and once hatched, the maggots will bore into the caterpillar and feed on them while they are still living. You can generally tell if your caterpillar has been infected if it suddenly gets much skinnier and will sometimes die while attempting to form it’s chrysalis. These flies also lay eggs inside chrysalises. After it’s host has died, the maggots will emerge, leaving tell-tale white strands of silk hanging from the caterpillar or chrysalis. How to prevent Tachinid Flies:
Pesticide PoisoningSadly, it occurs quite often where nurseries treat their milkweed with pesticides or roadsides/fields are sprayed where you collected milkweed/caterpillars unknowingly. How to tell if your Monarch has come into contact with Tainted Milkweed: If your caterpillar has ingested pesticides it will often expel green vomit. How to avoid this from happening:
Trichogramma Wasps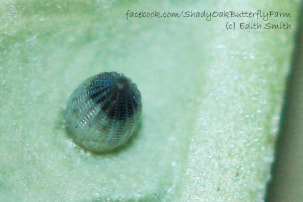 What are Trichogramma Wasps? They are tiny parasitic wasps that inject a single egg into the eggs of the pest. After consuming the contents of its host egg, a new adult wasp will emerge within 10 days. How to tell if your Monarch has come into contact with Trichogramma Wasps: If your egg turns completely dark keep an eye on it for the next couple of days to make sure a Monarch doesn’t hatch. If it doesn’t hatch, squeeze the egg inside of the leaf and dispose of the leaf. How to avoid:
Chalcid Wasps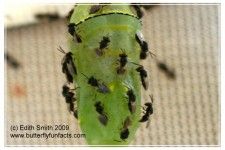 What are Chalcid Wasps? This is another tiny, parasitic wasp that waits for the perfect moment to attack your beloved caterpillar. It will approach when the caterpillar is in it’s vulnerable “J” stage and wait for it to form a chrysalis. Then, right afterwards, it lays hundreds of its eggs in the soft chrysalis. How to tell if your Monarch has been infected by Chalcid Wasps: Look for small black dots where it appears they have deposited their eggs. How to avoid:
Anal ProlapseWhen this occurs, the caterpillar’s rectum protrudes from its anus, leaving a bright green ball at the end of your caterpillar. It’s not known what causes this, but it’s always fatal to the caterpillar. 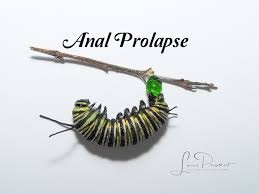 Resourceshttps://monarchbutterflygarden.net/common-monarch-diseases-prevention/
http://butterflyfarms.org/monarch-predators-parasites-and-diseases/ https://monarchjointventure.org/resources/faq/common-monarch-problems https://butterfly-fun-facts.com/oe-ophryocystis-elektroscirrha-monarch-butterfly/
309 Comments
I don’t know about you, but I find photographing insects and butterflies quite thrilling.It might be the act of slowly sneaking up on them or the knowledge that they could flit away at any moment, but I always feel a sense of accomplishment after capturing an elusive butterfly on camera. Looking closely at the intricate patterns and observing their intriguing behaviors can provide a new perspective. There are a vast number of insects in the world (in the United States, the number of described species is approximately 91,000) so you will never run out of subject matter! The beauty and diversity of insects may just open up a whole new world for you. EquipmentYou don’t have to break the bank on a new camera to get some great photos. Sometimes photos taken with your smart phone can be just as good as photos taken with expensive cameras. Here are a few options: A smart phone with a Macro lens attachment ($15 on Amazon) A digital camera set to Macro mode A DSLR camera with Macro lens attachment Let them come to youIf you are looking for a specific type of butterfly or insect, It is very helpful to know some of your subject’s nectar and food sources so that you don’t spend all of your time chasing an elusive insect. Simply sit back and wait by one of their favorite treats and it is much more likely that they will come to you. For instance, if you would like to photograph Painted Ladies, try hanging out near asters, goldenrods and marigolds. For Monarchs, think Milkweed! If you don’t have a specific subject-matter in mind but just want to photograph butterflies, head to a garden with lots of flowers, a field outside of town or the nearest butterfly house. Sometimes you don't have to go far at all. I've found both Tiger Swallowtail butterflies and Hummingbird Moths feeding on my Beebalm and Coneflower patch in my yard. It may be helpful to look over our Butterfly Identification 101 blog if you are trying to identify a butterfly. 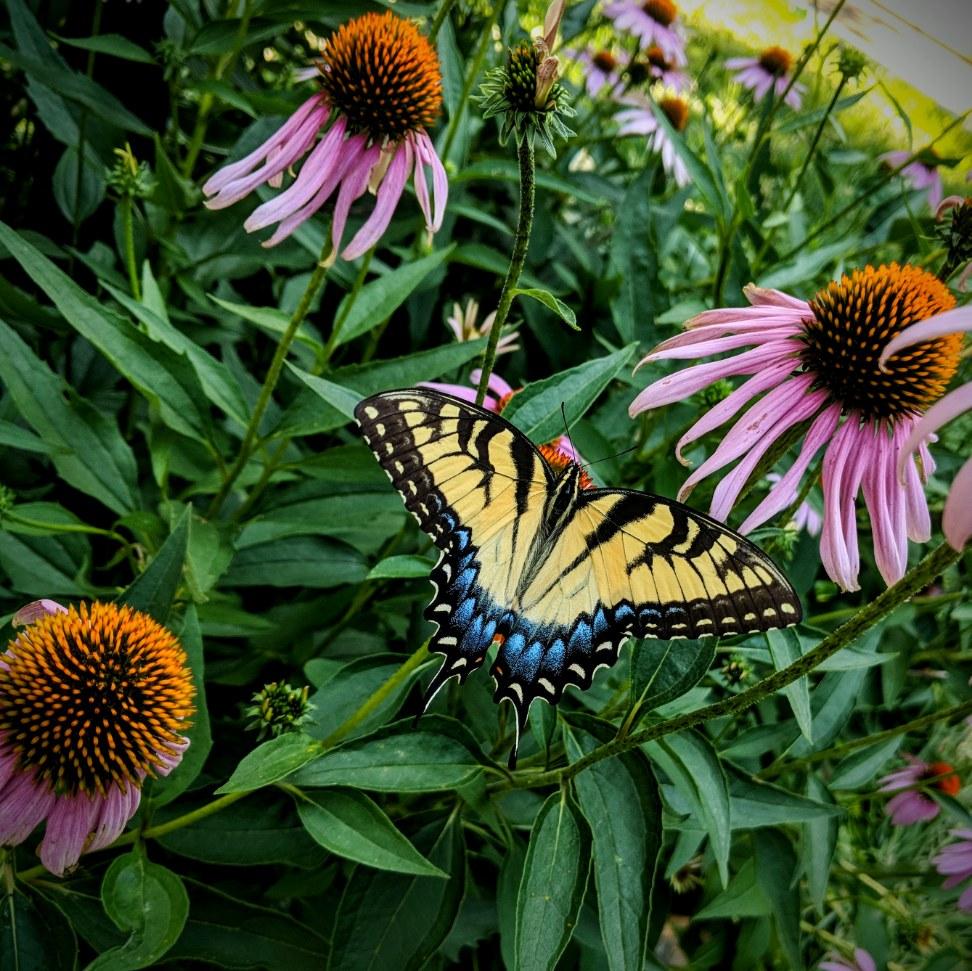 Picture of a Swallowtail Butterfly on a Pixel 2 phone with macro attachment. Photo credit: Matthew Losee Get the Timing RightThe best time to photograph butterflies is in the early morning when the lighting is soft and late afternoon when they are less active. If it is mid-afternoon and you have a perfect opportunity to get a shot, here’s a quick trick to optimize your photo. If it’s a cloudy day, wait for the sun to pass behind a cloud to get a good shot. Sometimes, when you cast a shadow on your subject or move the branch they are sitting on, they will move in order to find sunlight so try not to disrupt their environment too much.  A Monarch feeding on a Nasturtium. Taken with a Nikon D50. Photo credit: Rachel Liester Focus!You can start out with your camera in Auto Focus mode to ensure that you will capture your subject, especially when you know that you don’t have long to get the shot. However, if you do have a little bit of time to adjust your shot, manual focus will almost always get the clearest and most interesting shot. A rule-of-thumb is to focus on the insect’s eyes to get the best focus. Tip: Make sure that you have your settings on your camera or phone adjusted before you approach your subject of choice. Insects, and especially butterflies, are apt to fly off at any moment.  Close-up image of a Soldier butterfly feeding on a plant. Photo credit: Charlie Marshal Framing and CompositionThe main objective is to capture the subject even if it isn’t perfect so don't be afraid to take an initial shot when you can. If you do have time to frame the photo, even better! It’s best to get a plain background, to make sure your subject pops and provides optimal contrast. Butterflies don’t always have their wings open, so try to time the shot when their wings are open but also try different angles for more interesting photos. 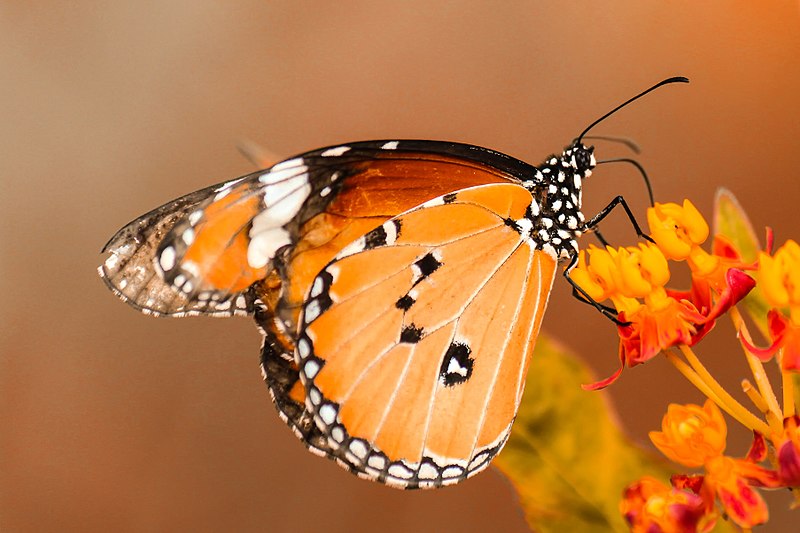 Butterfly on Butterfly Milkweed. Photo credit: Boris Smokrovic Ready to give it a try?SaveOurMonarch’s 3rd Annual Photo Contest is currently in progress until September 1st so you have lots of time to hone in on your insect photography skills and display them to the public! For for information, read eligibility guidelines on our Facebook page. Other ResourcesDigital Macro & Close-up Photography - Ross Hoddinott
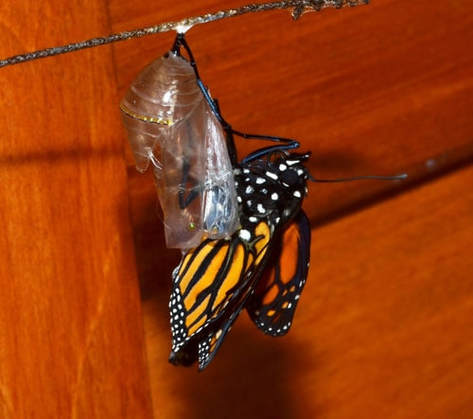
Close-up on Insects: A Photographer's Guide Hardcover – by Dr. Robert Thompson (Author), Stephen Dalton (Foreword) Why raise Monarchs at home?In the wild, Monarch eggs and larvae have a very small chance of survival. Several studies have documented mortality rates of over 90% during the egg and larva stages. That means only 10% of eggs and caterpillars will reach adulthood! Not only is it a fun activity for the whole family but you are actually helping out an entire species! Still not convinced?What if I told you it’s easy to rear Monarchs at home? All you will need to get started is a ventilated box (we recommend these inexpensive enclosures) a few milkweed plants and, of course, your Monarch egg or caterpillar. The entire process from egg to adult butterfly takes about 1 month. But first...It's important to understand the life cycles of a Monarch before you get started. Monarchs go through complete metamorphosis in which there are four distinct stages of growth in one life cycle! These stages are: egg, the larvae (caterpillar), the pupa (chrysalis), and adult butterfly. Life Cycle of a MonarchEggMonarchs overwinter in Mexico and certain parts of Southern California. When they wake up from hibernation, they will intuitively head North and East to start laying eggs. In March and April the eggs are laid on milkweed plants and it takes only 4 days for an egg to hatch! According to Karen Oberhauser, Monarch biologist, captive monarch butterflies average about 700 eggs per female as opposed to 300-400 in the wild. Monarch females usually lay a single egg on a milkweed plant on the bottom of leaf. So, when searching for eggs, don't forget to flip the leaf over! Eggs are very small and sometimes easy to miss! 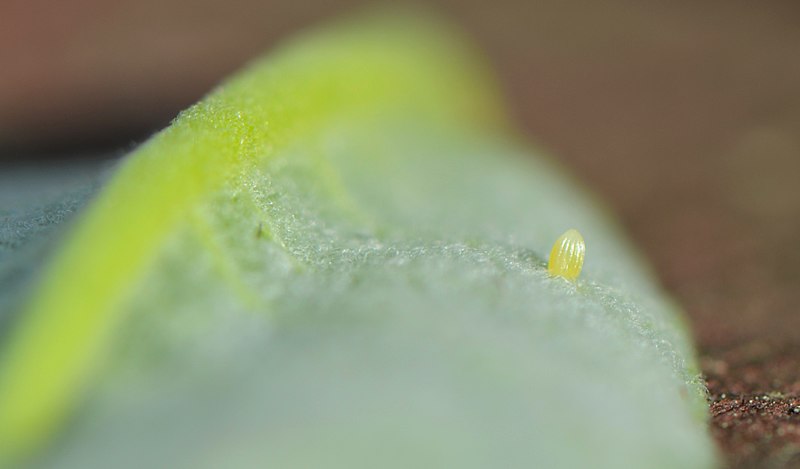 A monarch egg on a leaf of common milkweed Larval Stage (Caterpillar)The larval stage last 2 weeks. Once the egg has hatched, a very small (and hungry) caterpillar emerges. During this time, the caterpillar will spend most of it's time eating so it will need fresh leaves everyday. As the caterpillar grows and becomes too large for its skin, it molts. The intervals between molts are called instars. Monarchs go through 5 instars. Click here if you'd like to learn more about differentiating the different instars. 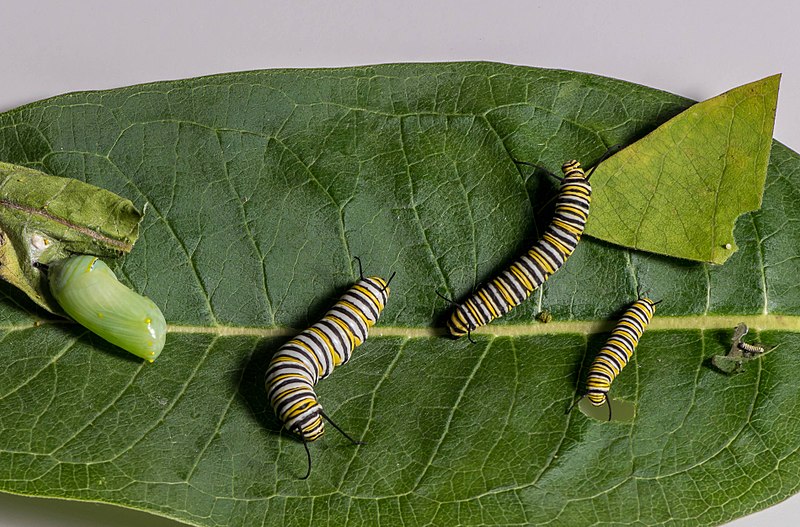 The image displays 4 instars of the caterpillar and the chrysalis. Pupa (Chrysalis)Once the Monarch larvae has reached their final molting stage, they will hang upside down by their last pair of prolegs and create a chrysalis. They will spend between 1 and 2 weeks inside the chrysalis. 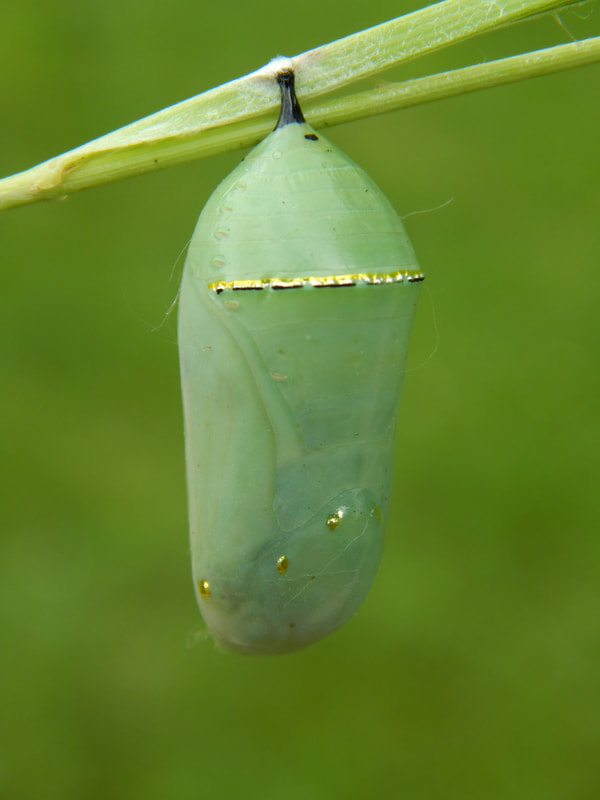 Photo credit: Rachel Liester of Red Road Herbs Adult ButterflyBefore the butterfly emerges, the chrysalis will turn from green to clear like in the picture below. Once adults, Monarchs will live another two to six weeks in the summer. However, the last generation of super Monarchs that complete the migration much longer, about six to nine months. 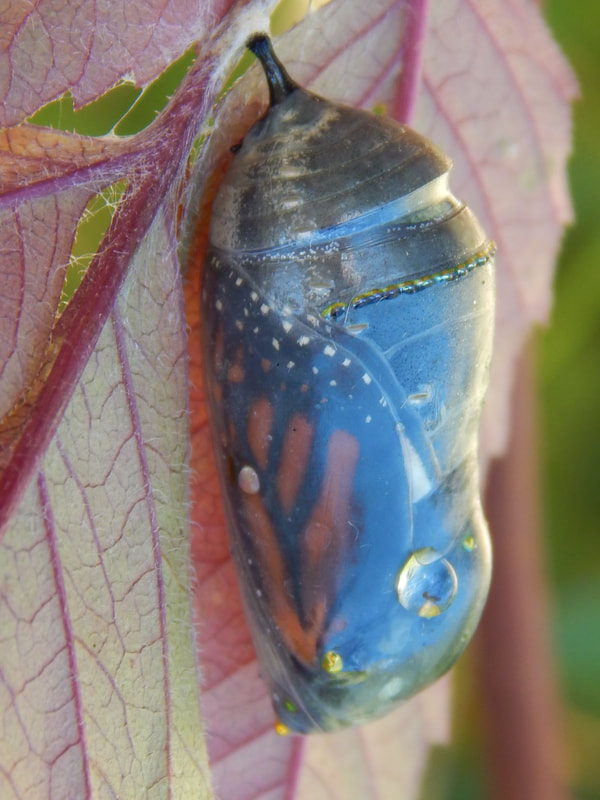 Photo credit: Rachel Liester of Red Road Herbs 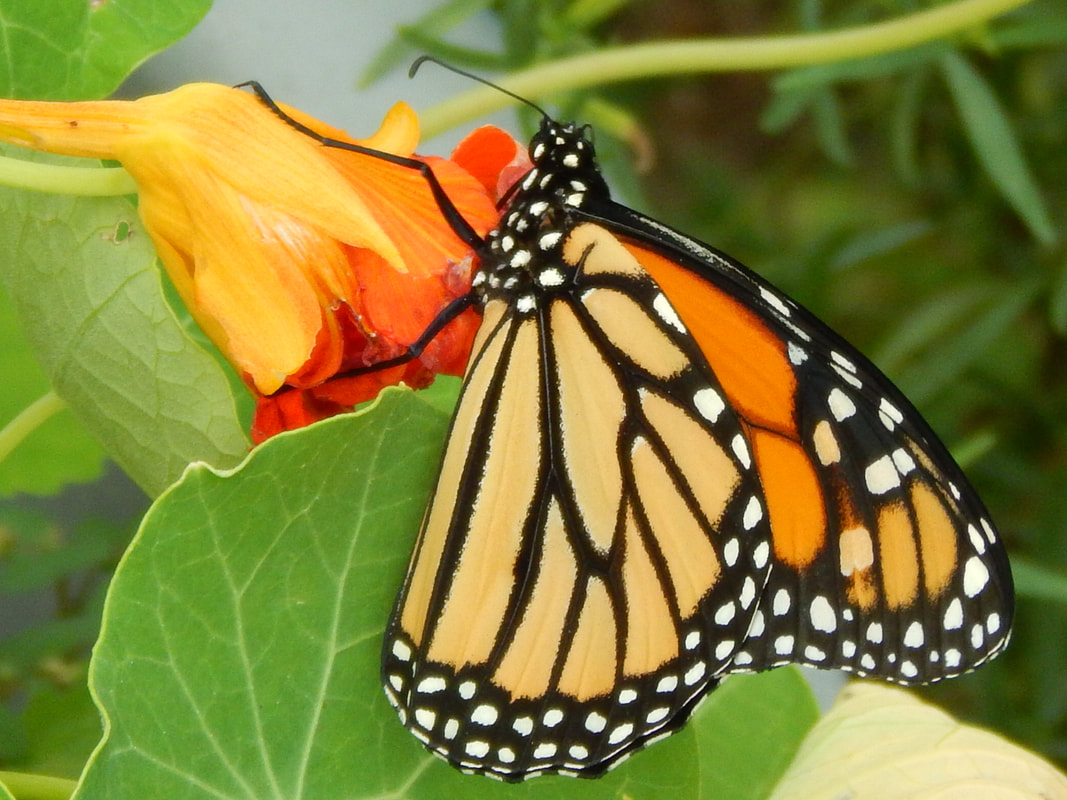 Photo credit: Rachel Liester of Red Road Herbs Materials Needed for Raising Monarchs1. Milkweed Make sure you have a local nursery that you can acquire milkweed plants from or you already have some established in your yard because Monarch caterpillars can eat up to 200X their own body weight! Click here for types of Milkweed that are suitable for rearing Monarchs. 2. Monarch caterpillars or eggs- These can be found outside on milkweed plants or purchased. 3. Ventilated container such as a deli container or aquarium works well. We recommend these inexpensive enclosures that make for easy cleaning. Use promo code 'monarchs10' to receive an additional 10% off. 4. Paper towels 5 Steps to Raising A Monarch at HomeStep 1: Find the eggs and/or caterpillarsThe best way to do this is to visit milkweed plants daily that you know are already established and if you planned ahead, are already in your backyard! If you don’t have any luck finding milkweed plants or caterpillars, you can also order monarch rearing kits like this from Monarch Watch that contain live caterpillars . Step 2: Choose a containerPut the eggs or caterpillars in a container and line with paper towels. Eggs only take 4 days to hatch and caterpillars will form a chrysalis within 2 weeks. Caterpillars have a HUGE appetite and can eat 200X their weight in Milkweed! A single caterpillar can easily defoliate a milkweed planted in a 1 gallon container so plan accordingly. Provide fresh leaves daily or enclose the entire milkweed plant. Larvae will survive best and attain a large size if you keep the food fresh, the container clean, and the humidity low. 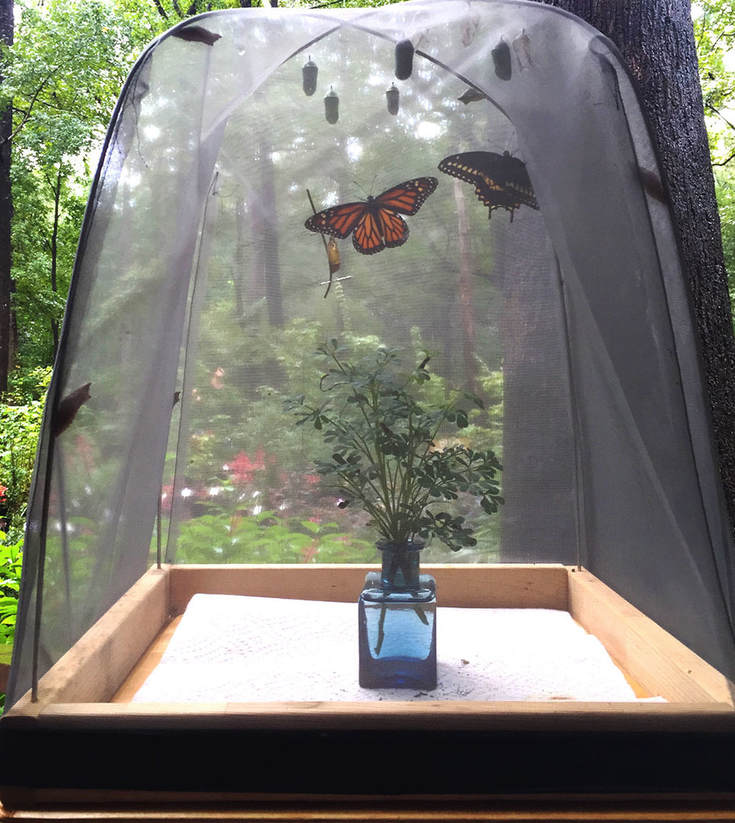 Step 3: Clean the cage regularlyThe caterpillars are eating constantly so they will generate a lot of frass (cute name for you know what). This frass should be collected every few days in order to keep the larvae healthy and you can replace the bottom of the container with more paper towels or parchment paper. You can even sprinkle it on your plants outside to give them a nitrogen boost! Step 4: Keep feeding the hungry caterpillars! It's important to remember that as the caterpillars get bigger, so will their appetite so keep a close eye on them and make sure you are providing enough fresh Milkweed. After the caterpillar reaches it’s 5th instar (molting stage) it will climb to the top of the container and create a beautiful chrysalis. It will not need any food at this stage so your job is mostly done! 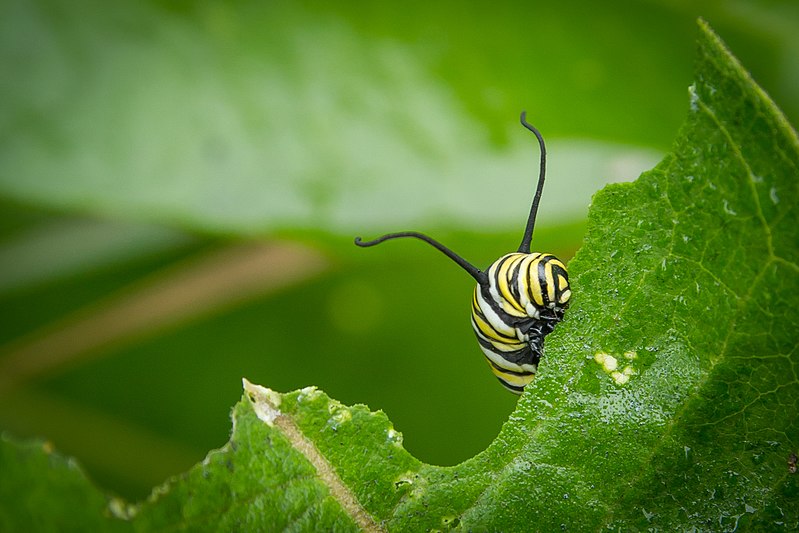 A very hungry caterpillar Step 5: Release Your Butterfly Into the WildThe chrysalis will turn clear before the adult butterfly emerges (fully metamorphosed). It is important not to touch them for at least 5 hours so their wings can dry. Keep an eye on the weather and do not release your Monarch if there is a storm on the horizon. You may need to move the butterfly into a larger container if this is the case such as an upside down laundry basket or a mesh cage. 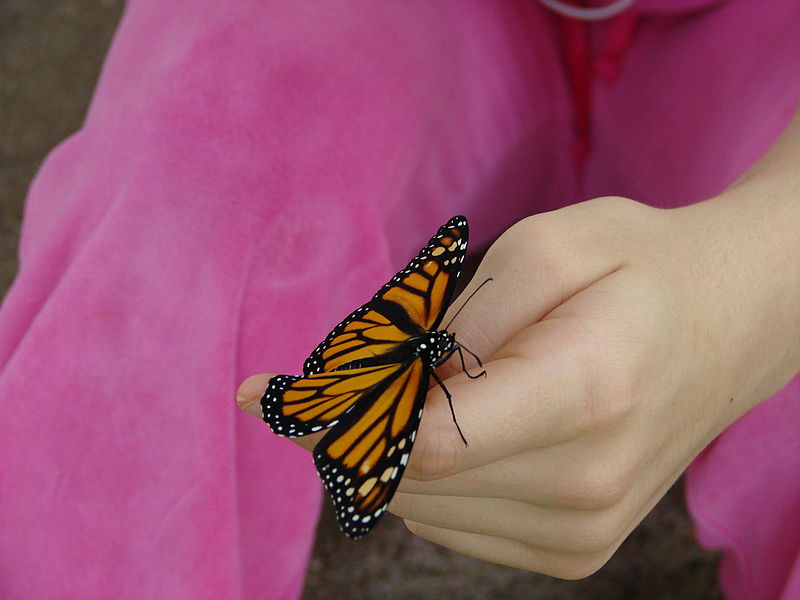 ResourcesSpecial thanks to Debbie Jackson of Monarch Watch for sharing her passion of rearing Monarchs We also recommend Carol Pasternak's How to Raise Monarch Butterflies, an in-depth guide on Monarch rearing https://monarchlab.org/biology-and-research/biology-and-natural-history/breeding-life-cycle/life-cycle/#adult
http://www.ecology.info/monarch-butterfly-page-3.htm  One of the biggest factors contributing to the loss of Monarch butteflies and Milkweed is the use of pesticides and herbicides. Many pesticides contain neonicitinoids and glyphosates that are deadly to beneficial pollinators and Milkweed.Harmful herbicides and insecticides are used generously in agriculture as well as in gardens. For a list of garden products that contain these harmful ingredients click here. What are neonicitinoids?Neonicitinoids are a class of broad-spectrum insecticides that are very commonly used in agriculture as well in urban gardens. They are systemic which means the plants absorbs the compounds into its tissues and distributes them into its roots, leaves, and flowers. Thus, making the entire plant toxic to insects that feed on it, including pollinators such as bees and butterflies. They are harmless to humans in small doses but they attack the central system of insects, acting as a neurotoxin. What can I do to help?You can help by providing habitat, no matter how small, and by protecting the monarch by using natural pest control methods on your milkweed and other pollinator plants. Below you will find a list of natural pest control methods that will not harm beneficial insects like monarchs. 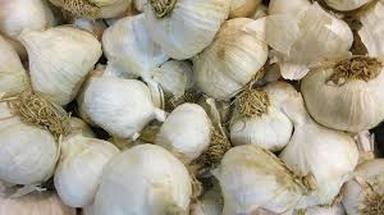 Pepper and Garlic SprayHow to make it: For a strong spray, crush 3 cloves of garlic and add 3 tablespoons of hot pepper flakes to a cup of boiling water. Allow it sit overnight. Strain out the garlic and pepper flakes in the morning. Adding a dash of dish soap or vegetable oil can also improve effectiveness. Used for: All garden pests. How to use it: Spray directly on the plant. Make sure to get the underside of leaves where many pests lay eggs. You can use this spray daily if you have a pest problem or less regularly as pest prevention.  Kaolin ClayWhat is it? Kaolin Clay is a natural mineral that is used for insect control on plants. It creates a thin barrier on the leaves which adheres to insects, causing excessive grooming, and thereby eliminating their urge to scavenge on the plant. Used for: The use of Kaolin clay in the garden has been found to not only control insect pests but also protect the plant against sunburn or heat stress. You can purchase it online. How to use it: To use Kaolin clay on plants, it must first be mixed with water and applied via a spray bottle. The clay particles are very fine therefore the spray bottle must continuously be agitated and applied liberally.
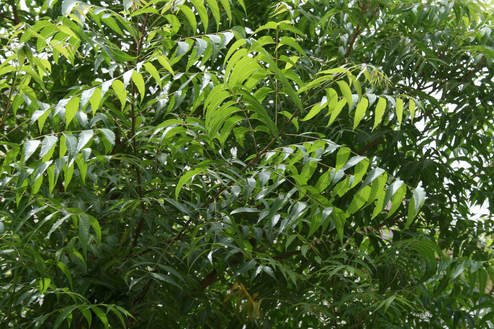 Neem OilWhat is it? Neem oil is derived from the Azadirachta indica evergreen tree native to the Indian subcontinent. Neem has a long history of being used in the garden as a natural insect repellent. Used for: mites, including aphids, white flies, snails, nematodes, mealybugs, cabbage worms, gnats, moths,cockroaches, flies, termites, mosquitoes, and scale. How to use: Spray directly on the plant, including the bottoms of leaves. Diatomacious EarthWhat is it?
Diatomaceous Earth is made of fossilized shells of tiny organisms called diatoms. It looks like a white, chalky powder. Used for: aphids, mites, ants, thrips, slugs, snails, and other soft bodied insects How to use: Shake powder onto leaves or at base of plant OR mix with water to make a spray. It will cut soft parts of insects which kills the insects by dehydrating them. 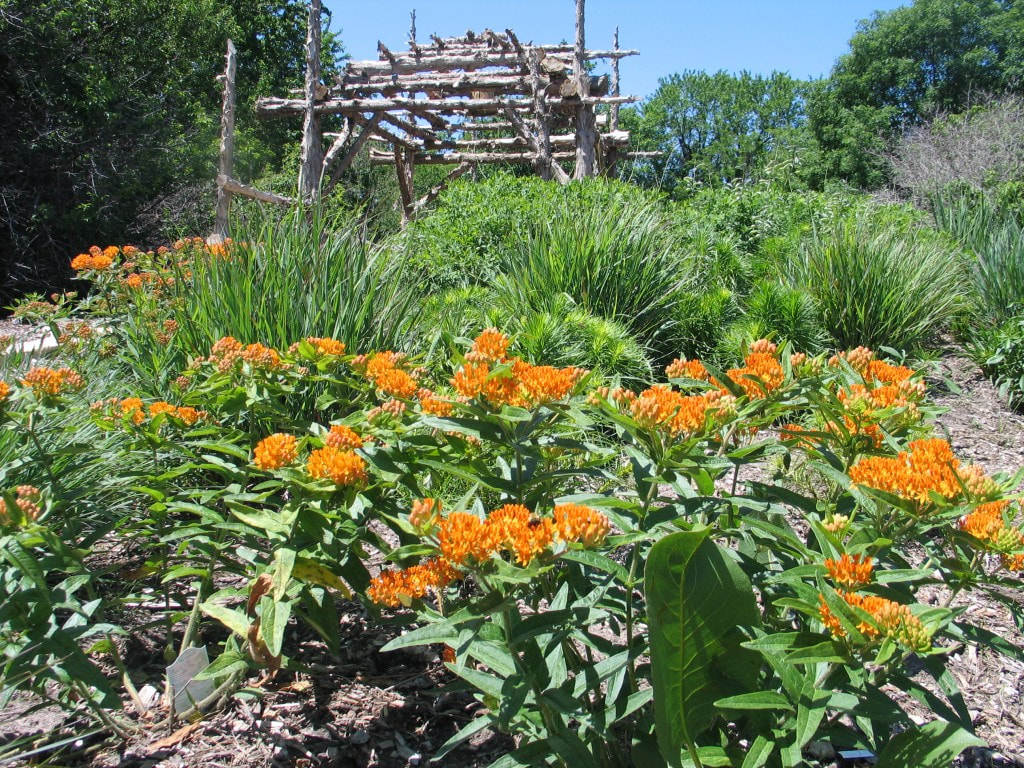 Native plants are a hot topic right now but why do some people like them while others do not? What exactly are native plants and what roles do they play? I will explore these questions so that you can walk away with an educated view of what you want to put into your garden or landscape. What is a Native Plant?According to the USDA a native plant is, "a plant that is a part of the balance of nature that has developed over hundreds or thousands of years in a particular region or ecosystem". Doug Tallamy and Rick Darke define a native plant in their book The Living Landscape as: “a plant or animal that has evolved in a given place over a period of time sufficient to develop complex and essential relationships with the physical environment and other organisms in a given ecological community.” Basically these plants have been around for hundreds of years, creating a specialized niche in the food chain while creating evolutionary relationship with the plants and animals around it! Native vs Ornamental plantsMost of the plants available in nurseries are not native, but exotic ornamental varieties that have evolved in other parts of the world. When you put these plants in your garden most native bugs cannot feed on them. Many people actually like ornamental plants because most bugs won't feed on them. However, what implications does this have for the community of insects and birds that rely on plants as a food source? According to Douglas Tallamy, expert on plant-insect relationships, a large majority of insects can reproduce only on plants they have an evolutionary history with — such as monarch butterflies and species of milkweed. What is the difference between host plants and nectar plants?It is important to know the difference between nectar and host plants when you are shopping for native plants so that you have a mixture of both in your garden. Did you know that some insects will lay their eggs only on specific plants? The Monarch is a great example of this! Flowers that are rich in nectar may attract adult butterflies but that doesn't mean the butterflies will stick around once they are done feeding. They will still be searching for a plant to lay their eggs on. By planting host plants, you will ensure that when the butterflies arrive they will stick around to lay eggs on your plants! If you are wondering if a plant is a host of nectar source, simply do a google search to find out. For instance, if you want to attract Monarchs, plant species of milkweed as a it is their only host plant. They also enjoy feeding on asters, sedum and verbena! How do I know what plants are native to my area?I’m glad you asked! Native Plant Finder is a wonderful tool developed by Douglas Tallamy, renowned expert in the science of plant-insect interactions, to help you find the best species to attract pollinators and birds in your area. It is currently in the beta stage because it is a steady work-in-progress. It is simple to use and you can type in your zip code to get a specific list of pollinators species in your area. Another great resource is your local extension office. They will provide you with many resources specific to your area. You can also call around to your local plant nurseries to ask what they have in stock for native plants. If they don't have any, make sure to request that they order some in. Also, ask if the plants have been treated with any systemic pesticides, like neonicotinoids, which can kill an insect that feeds on it. Simply walking around undisturbed habitats like parks are another great way to observe what plants are growing naturally. 5 Reasons To Love Native PlantsThey are low maintenance once established. They are every bit as beautiful as exotic flowers. They provide a healthy space for people, especially kids. They don't need any fertilizers or pesticides to grow. Many lawns are covered with herbicides and pesticides that may contain neonicitinoids and are potentially dangerous to kids and adults alike. They help to conserve water and lower ground temperatures. Native plants are adapted to local environmental conditions so they do not need water, other than rainfall, once established. They help to support wildlife such as insects, butterflies and birds! SourcesThe Audubon Society- https://www.audubon.org/content/why-native-plants-matter
Monarch Gardens LLC- https://www.monarchgard.com/articles.html Tallamy, Doug. Bringing Nature Home. 2007. http://www.bringingnaturehome.net/ Tallamy, Doug and Darke, Dick. The Living Landscape. 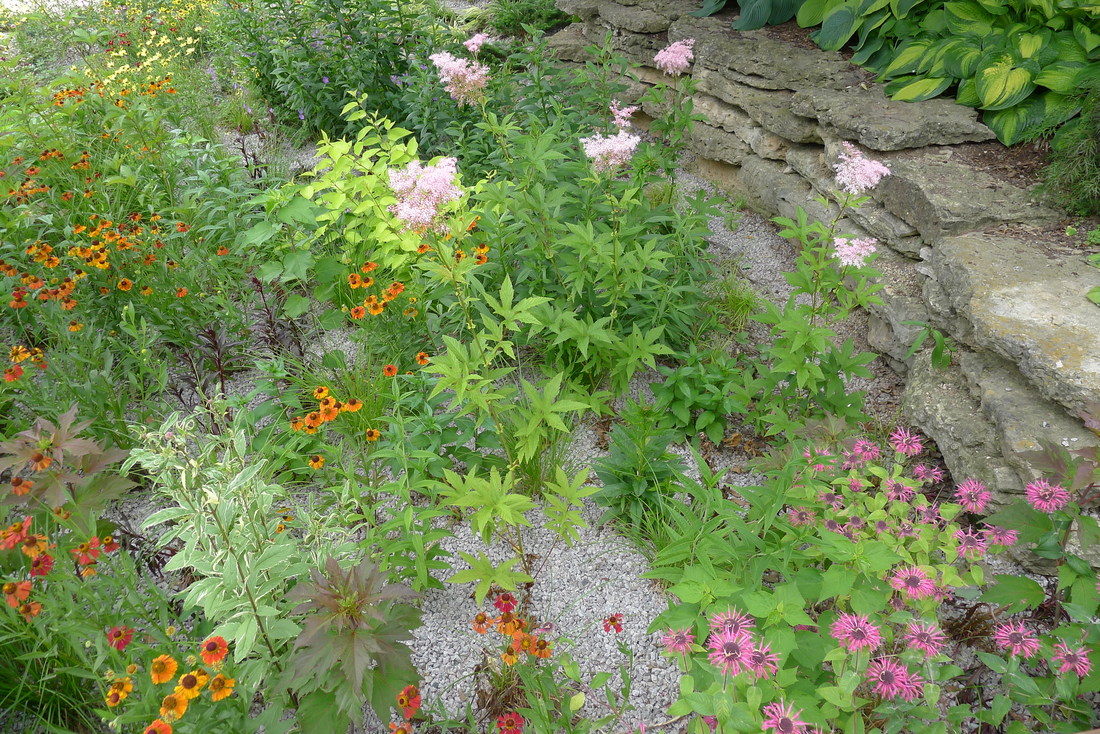 A rain garden is a garden of native plants that are planted in a small depression or slope. It is designed to temporarily hold and soak in rain water runoff that flows from roofs, driveways, patios or lawns. What are rain gardens supposed to do?During a rain storm, rain water will gush out of the gutters and downspouts, across lawns that have been treated with fertilizers and into a storm drain that then dumps it into local rivers and lakes. Rain gardens capture and filter this rainwater, nurturing native plants and creating a beautiful habitat for native species of insects. How do I plant a rain garden?1. Location, Location, Location
2. Measure Drainage Area (Optional)If you are building the rain garden in a low spot in your yard, it is not necessary to measure the drainage area. Just ensure the area receives water regularly during a rainstorm. However, if you are capturing water from a roof or other hard surface you will need to measure the specific drainage area of that surface and multiply by the number associated with the type of soil you have. For sandy soil multiply by 20%, for loam use 30-35% and for clay use 45-60%. This is a bit of an overestimate but it will ensure that your plants get enough water. 3. It's time to choose your plants!Native plants are highly recommended for use in rain gardens because they are well-adapted to the environment and have very deep roots for absorbing water. You will want to choose plants (flowers, grasses and sedges) that will grow well in both wet and dry areas because the rain garden will temporarily fill with rainwater from time to time. 4. Create a DesignReady for the fun part? It is helpful to plan your garden on paper first so that you can create the best rain garden possible. A garden plan can be created simply using a pen and paper or an online garden planning program. 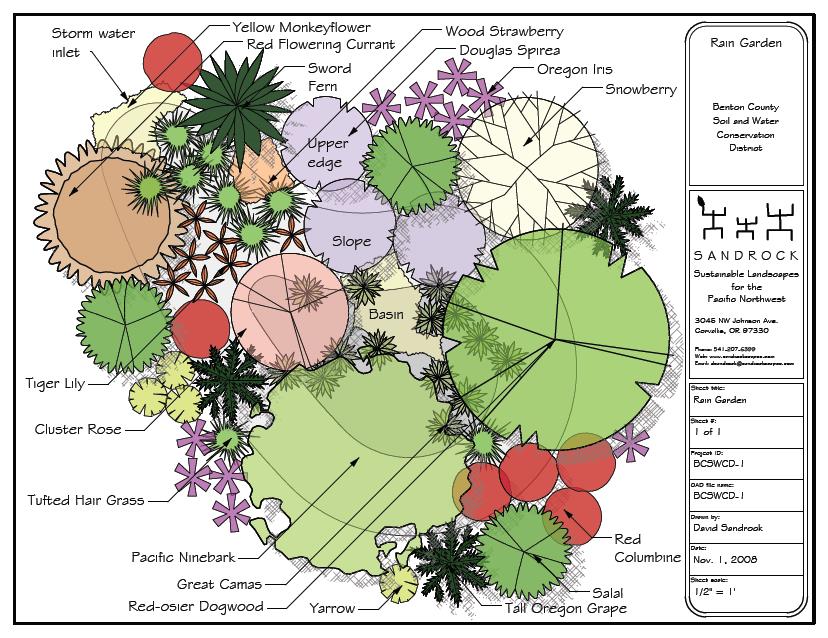 5. Create a Layout of the GardenLay out the shape and boundary of the garden based on your design. I like to plan by "zones" or small microclimates. For instance, Zone 1- lowest, wettest part Zone 2- medium-dry, will occasionally get wet Zone 3- highest, driest part of the garden. When searching for plants, match their optimal growing conditions with the appropriate zone in your garden. 6. Start digging!Remove the turf grass and dig your garden approximately 4-8 inches deep. Make sure you create a gentle slope so that you have clear microclimates and to not erode the soil. Use the soil to build a berm around the garden edges so overflow is minimal. 7. Prepare the SoilAmend the soil with about 2" of compost and you can also mix in other organic amendments such as alfalfa meal, bone meal, fish meal ect. Mix in well to provide extra nutrients for your plants. 8. Planting!Follow the design you created and place your plants in the approximate positions before planting. Step back and look at the garden and the design. Plants should be placed about 1 foot apart from each other. Once you are satisfied you can start planting the flowers and grasses using a hand trowel. 9. Mulch the GardenUse coarse, fibrous, shredded wood chips that won’t float or blow away. Apply the mulch about 2-3 inches deep. This will help to keep the moisture in and the weeds out. 10. Arrange the Water SourcesAfter you have planted the garden, water every other day for 2 weeks if there isn't rain in the forecast. Keep an eye on your rain garden while it is still establishing itself. Once the plants seem to have established good root systems and are growing bigger, you can slowly decrease how much time you spend maintaining it.
 Bloom SuccessionBloom succession- plants that start blooming at different times of the year- is a huge component to planning a thriving pollinator garden. It creates a beautiful year-long display and also provides butterflies with a food source all year long! Make sure to consult your local native plant nursery or extension office to get accurate bloom-times for your flowers. Sometimes a plant that is distributed throughout the U.S. will bloom slightly earlier in the warmer regions compared to the colder Northern regions. Pollinators need more than just flowers to survive. They also need leaves to feed and reproduce on. Plant a variety of plants that are both nectar sources as well as host sources for insects. Butterflies also need shelter from wind and rain. Having a mixture of plants in your garden such as trees, shrubs, grasses and sedges will provide great habitat for a variety of insects.  Plant Native PlantsBenjamin Vogt, author of “A New Garden Ethic” says, “Right plant, right place. The benefit of native plants is in their wildlife support, and re-wilding the landscapes we've erased around our homes.” There are many resources out there to start researching native plants in your area. Remember, your local extension is a great resource along with local botanical gardens and native plant nurseries. Some plants such as the Butterfly bush (Buddleja sp.) are known for being a great pollinator plant. However, they can become invasive since they are not native. Butterfly bush is not a host to a single insect species in the U.S. and has been banned from being sold in Oregon. That doesn't mean that it doesn't offer nectar. However, it offers nectar only to the insects with a specialized proboscis to reach the nectar. Think Like a ButterflyGive it a try! It may help you to appeal to the butterflies you are trying to protect. If you were a butterfly, what would you enjoy the most? Perhaps, moisture, a place to rest and nectar of course! When the growing season is over, that doesn't mean the butterflies are gone. If you leave your plants and leaves and delay plant material removal, they can provide butterflies a home in the winter. Benjamin Vogt recommends, cutting down perennial flower stems and grasses to about 12 to 18 inches tall, which will leave future homes for spring and summer bees to nest. Happy Gardening!  "Imitation is the sincerest form of flattery."- Oscar Wilde |
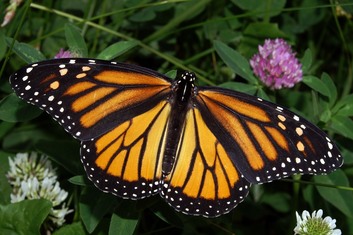 An adult monarch butterfly | 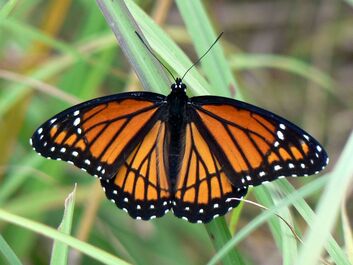 An adult viceroy butterfly. Note the black line across it's hind wing, differentiating it from the monarch. |

The viceroy caterpillar doesn't look anything like the monarch caterpillar
Why is it important to be able to tell the difference between the two?
- Citizen science is only helpful if the data is accurate. Monarch populations are in decline and it is important to be able to report sightings in order to gather data on their migration cycle.
- Planning your butterfly garden. Viceroys feed on all plants in the willow family, but the females will also deposit eggs on plums, apples and cherries. Monarchs feed and reproduce solely on Milkweed.
- It’s fun and educational! You can impress your peers by being able to aptly identify different kinds of butterfly and also be able to share this knowledge with others to increase conservation efforts.
Why does the monarch taste bad to predators?
The monarch is unpalatable to its predators because it feeds on milkweed as a caterpillar which contains toxic cardiac glycosides. It’s brightly colored wings also serve as a warning sign of its toxicity to its predators.
Other lookalikes
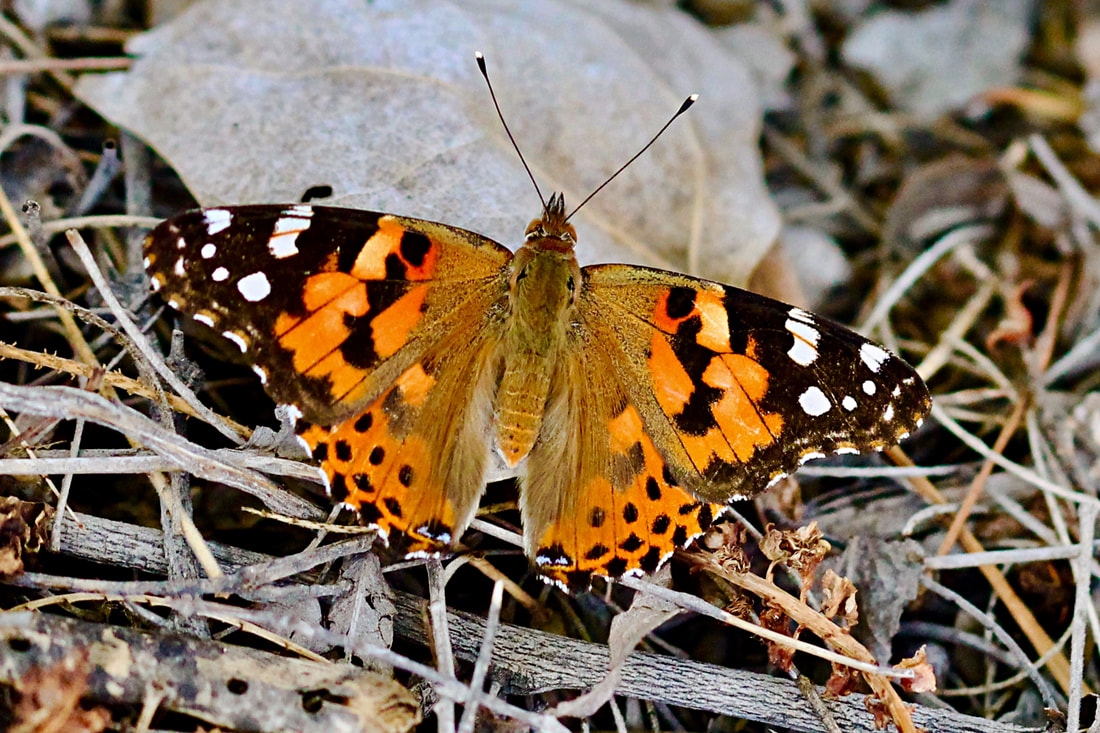
Although black and white, the painted lady (Vanessa cardui), has quite a different pattern than the Monarch. It has scalloped orange wings with black patches. The tips of its forewings are black with white splotches. Its underside is a mottled gray, brown, and black with four eyespots. The painted lady is also called the thistle butterfly because it likes thistles and the cosmopolitan butterfly because it is found all over the world (NHPBS).
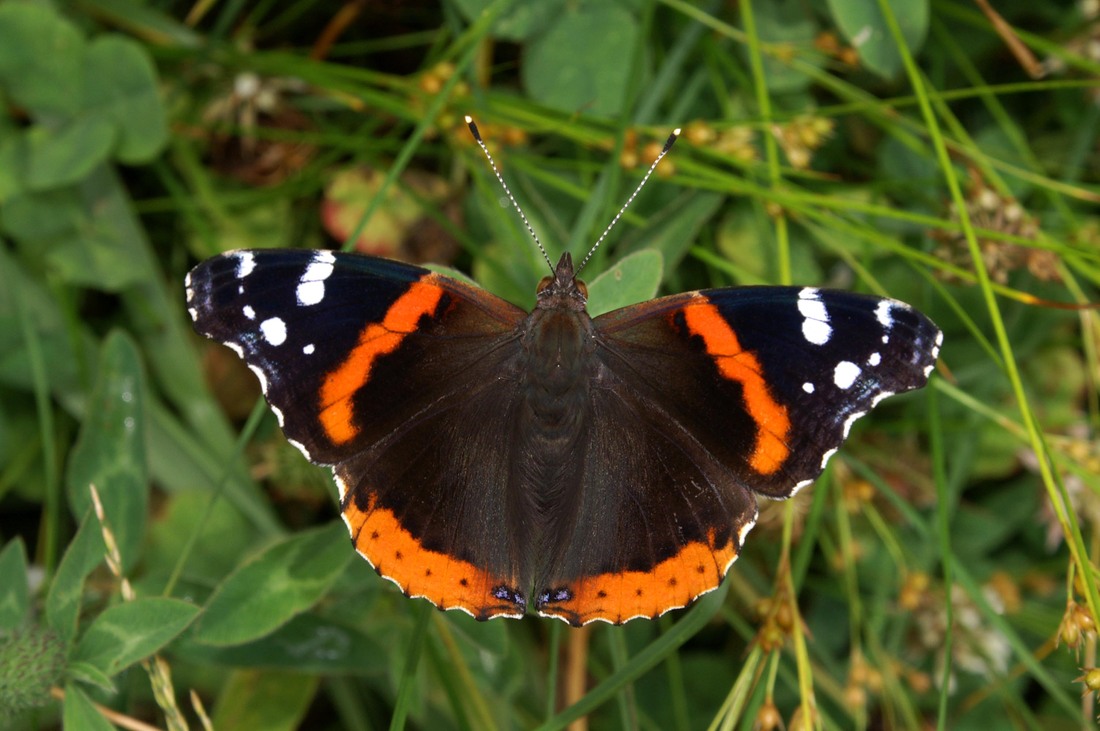
The Red Admiral (Vanessa atalanta) has much more black than the Monarch. It has a black upper forewing with a bright, diagonal red-orange band across it and spots of white on the tips. It also has a red marginal band on its hindwing and the underside is a mottled brown.
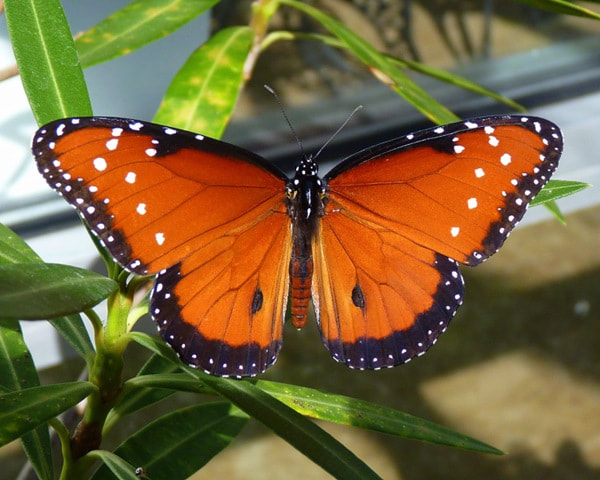
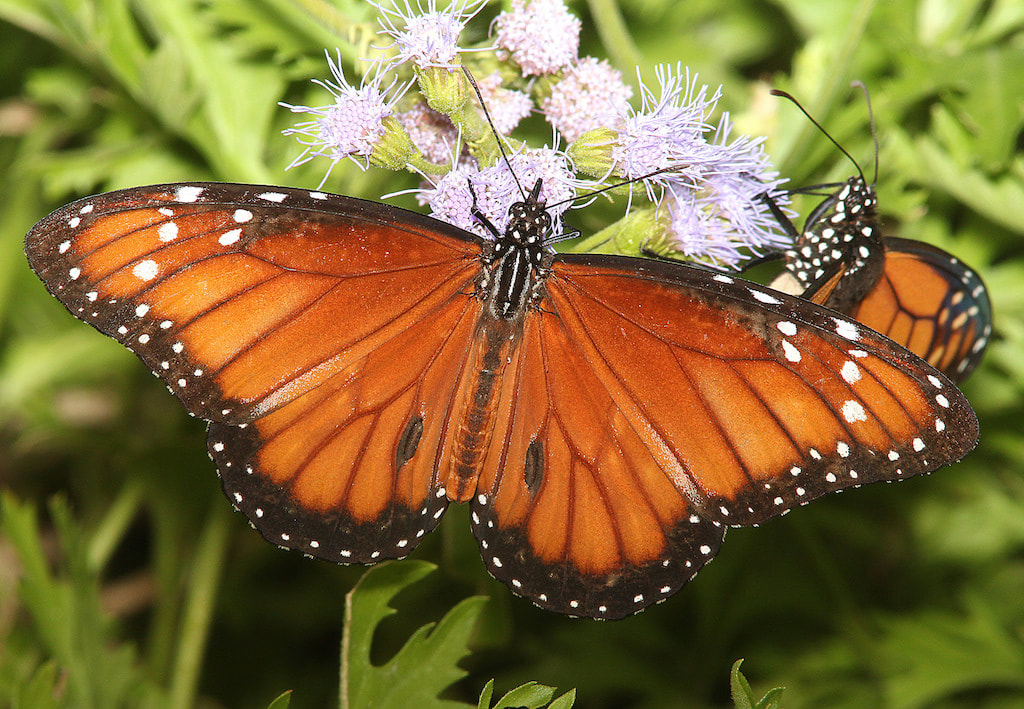
The queen butterfly (Danaus gilippus) has white spots on its hind wings, distinguishing it from the monarch. It is also a darker color orange than monarchs. During the caterpillar phase, however, the monarch and queen are very similar.
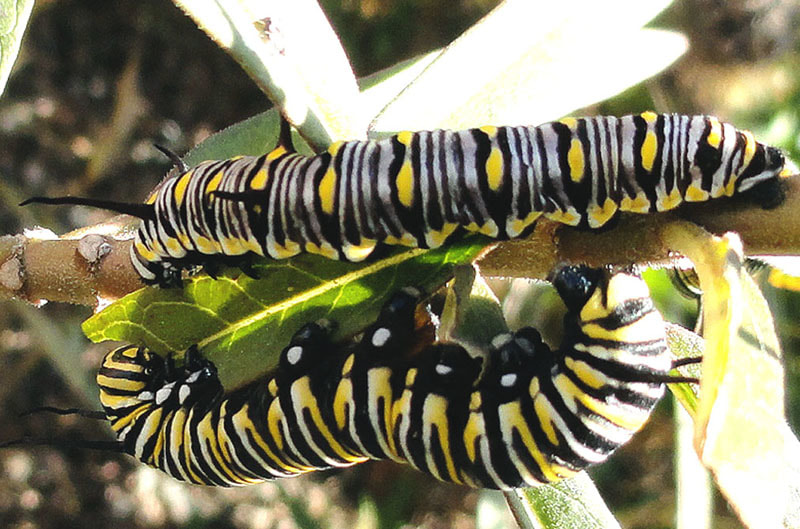
Here is a picture of a queen caterpillar on top and a monarch caterpillar on bottom. They are closely related and in the same genus (Danaus). Queen butterflies do not migrate.
Soldier butterfly (Danaus eresimus) is a cousin to the monarch (Danaus plexippus). It is a darker orange than the monarch and has white spots on its wing borders. It is also smaller than the monarch.
Every Milkweed Counts.
Teachers and educators can sign up here to receive their free seed packets and join Save Our Monarch's Pollinator Garden Program.
You don't need a lot of space to start a pollinator garden and just a few containers or raised beds can provide a habitat for hungry butterflies and bees. Having this outdoor classroom can encourage observation, exploration and a instill land stewardship values. Teachers can also build a curriculum around the garden, focusing on subjects such as: biology, environmental studies, writing, and art.
Save Our Monarch's Pollinator Garden Program encourages every school, scout troop and 4H club to participate. Once enrolled, schools will receive three 3 free Milkweed seed packets and one a pollinator mix, containing 25 wildflower varieties. Our goal is to plant over 1,000 Pollinator gardens across the US this year.
Getting Started
First you may need to establish a committee, club, or talk with students to see who is interested in caring for the garden. If there is already a Garden Club in place, then you are halfway there! Consider starting a Roots and Shoots Club which has a large community and thousands of free resources for teachers and educators.
If you don't already have a garden site established at your school or community space, have the students scope out a good location for the garden. The garden will need to receive at least 6 hours of direct sunlight and have easy access to water. Remember that raised beds and container-gardening are great options as well.
If you don't already have a garden site established at your school or community space, have the students scope out a good location for the garden. The garden will need to receive at least 6 hours of direct sunlight and have easy access to water. Remember that raised beds and container-gardening are great options as well.
Do your research
Research pollinator species native to your region and find out what they need to thrive and reproduce. Then, you can call or visit local nurseries in your area to find these plants and discover what soil types they prefer. It is also important to choose plants that bloom at different times so that you will have year-long food source for pollinator species.
Choose seeds or small plants
Small plants that have already started growing in a nursery are simple and have a much higher rate of success. However, seed-starting is also a great activity for students that can begin as early as January. Seed-starting is best if you plan ahead and start early. Seed-starting can also be a good option if you are creating a very large garden as they tend to cost less. Also, look for free seeds and donations!
Plant Native
Use as many plants native to your region as possible. Native plants have evolved closely with native species and will be able to provide them with food shelter. In fact, some pollinator species are entirely dependent on the availability of certain native plants.
In general, the more variety the better! You want to attract as many different types of pollinators as you can. When in doubt, call your local plant nursery or extension office and ask what they recommend. Plants that are a variety of shapes, sizes and colors will accommodate the most variety of pollinators.
In general, the more variety the better! You want to attract as many different types of pollinators as you can. When in doubt, call your local plant nursery or extension office and ask what they recommend. Plants that are a variety of shapes, sizes and colors will accommodate the most variety of pollinators.
Build a Curriculum
Science/Biology – Study the life cycles, reproductive cycles, and anatomy of pollinators. Take the students outside and observe them in their natural habitat. Another fun activity is rearing Monarchs in the classroom and later releasing them in your garden.
English – Challenge students to write poetry and engage in creative writing while they sit and observe their favorite butterfly or plant.
History/Social Studies – Discuss how the environment has changed over the years and how this can relate to different pollinator species.
Art- The possibilities are endless for art projects related to the garden and pollinators! You can encourage students to make signs for the garden or paint raised beds to build pride around their garden. Get creative with different art media such as clay, paper, rock, colored pencils and so forth!
Plant, Water and Wait!
Once you have found your garden group, done your research and acquired your plants or seeds, it's time to plant! Remember that gardens require regular maintenance so it is important to establish specific times ,such as at the beginning of class, to visit the garden. Then just wait for the bees and butterflies to start filling your garden.
Free Garden Resources
Although the name might be deceiving, you do not have to be a professional scientist or even come from a scientific background to become a citizen scientist. Citizen scientists are vital components to understanding the decline of Monarch populations and much of what has been learned about the Monarch butterfly is the result of citizen science projects.
It's quite easy to become a citizen scientist and help the vanishing Monarch butterflies. What are you interested in learning? Are you interested in tracking the Monarch migration? monitoring overwintering sites? identifying Milkweed plants? understanding Monarch health? or simply enjoying nature while counting butterflies? There are projects just like this out there!
It's quite easy to become a citizen scientist and help the vanishing Monarch butterflies. What are you interested in learning? Are you interested in tracking the Monarch migration? monitoring overwintering sites? identifying Milkweed plants? understanding Monarch health? or simply enjoying nature while counting butterflies? There are projects just like this out there!
1. Choose a Project
Find a project that calls to you. If you are in the path of the Monarch migration or located near an overwintering site, your data is especially important.
Check this list of Monarch and butterfly conservation projects to pick one suited to your area and interests. Since you already know how to identify Milkweed, you could participate in the Western Monarch Milkweed Mapper project!
Even if you aren't in the path of the migration, there are still many projects out there and eButterfly is a great place to start. Monarchs are not the only Lepidoptera in trouble and you can find other projects on
iNaturalist.
2. Don't forget to include the next generation of citizen scientists
Get the kids involved! There are lots of fun activities that the kids can enjoy while contributing to the well-being of the Monarchs.
One way to get children interested is by rearing monarchs at home or in the classroom. Learn how to rear Monarchs here. Other classroom projects include tagging monarchs, monitoring larvae, recording monarch health, and counting Milkweed plants.
One way to get children interested is by rearing monarchs at home or in the classroom. Learn how to rear Monarchs here. Other classroom projects include tagging monarchs, monitoring larvae, recording monarch health, and counting Milkweed plants.
3. Download a citizen science app on your phone to record results
There are free citizen science apps such as this and this available for you to easily track and reports spring and fall migrations. These apps allow you to report your sightings from the field while viewing maps, taking pictures and leaving comments. It is a great way to stay connected to your fellow conservationists and nature lovers!
Remember, there's nothing wrong with doing it the old-fashioned way and recording your results on a notebook then inputing your data when you get home.
Remember, there's nothing wrong with doing it the old-fashioned way and recording your results on a notebook then inputing your data when you get home.
4. Get the community involved
Host a Bioblitz or tagging event in your community! Ask around to find a place to host such as a local park, school, community center, or public library.
A bioblitz is a citizen-science collaborative effort to find and record as many species within a specific area and in a specific time period as possible. It is a fun way to engage the public while connecting with nature and also contributing to conservation efforts.
You could also host a "tag and release" event for all ages! Monarch tagging kits are available
here. Partner up with local organizations to host a fun event to help the Monarchs and don't forget to invite all your friends and neighbors!
Author
Rebecca Chandler
Garden Educator, Naturalist and Ethnobotanist
Archives
March 2024
January 2024
September 2023
August 2023
June 2023
April 2023
February 2023
March 2021
January 2021
December 2020
October 2020
July 2020
June 2020
May 2020
April 2020
March 2020
February 2020
January 2020
December 2019
November 2019
October 2019
September 2019
August 2019
July 2019
June 2019
April 2019
March 2019
February 2019
January 2019
December 2018
October 2018
September 2018
August 2018
July 2018
June 2018
May 2018
April 2018
March 2018
 RSS Feed